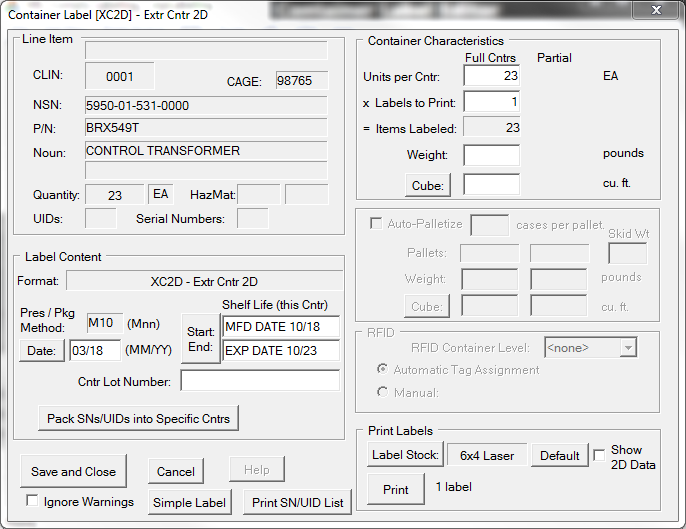
The Container Label Editor in Standard Mode is composed of six main sections:
This information, which forms the bulk of the label information and is shared by this item's other container labels (unit, intermediate and/or exterior). This data will generally be already populated. If not, select <New> from the CLIN pull down. Existing CLIN data may be modified by clicking on any field. Either action will bring up the CLIN Editor. |
Includes fields specific to the label. This may include the allocation of serial numbers and/or UIDs into specific containers, which is done by the [ Pack SNs/UIDs in Specific Cntrs ] button feature. The fields in this section are ones, such as Preservation Date or Shelf Life that may vary within the shipment of a CLIN. This section allow for overriding the data entered into the CLIN Editor for a subset of the labels printed. They may start out blank if the CLIN defined in Labeling or Shipper omitted them for completion at labeling time. |
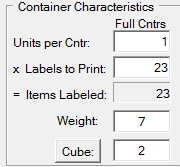
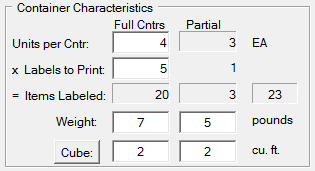
 This section defines the number of units that go into each container along with the weight and volume of the containers. Printing labels starts by defining the number of items that go into the container being labeled. This section defines the number of units that go into each container along with the weight and volume of the containers. Printing labels starts by defining the number of items that go into the container being labeled.•Units per Cntr is the number of items at the CLIN's UOI that are in each container. •Labels to Print is calculated by dividing the Line Item Quantity in the Line Item section by the Units per Cntr. •Items Labeled displays the total number of items (at CLIN's UOI) that will be labeled. It should equal the Line Item Quantity. •Weight of the container, expressed in pounds, rounded up to the whole pound. •Cube is the volume of the container in cubic feet, rounded up to the next whole cubic foot. You may use the [Cube] button to bring up the the Cube Calculator to assist in completing the field.  •Partial Column - is displayed when the number of Units per Container entered leaves a remainder. In this example with a a CLIN Quantity of 23, packed 4 Units per Cntr would leave a partial container with 3 units. The specific weight and cube of the remainder container would be entered in the partial column. |
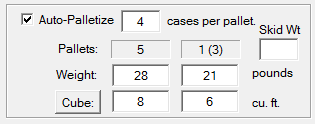
Auto-palletization builds up pallets from exterior containers, keeping track of the RF-tags and UIDs involved to make labeling much easier and to automate the submission of RFID and UID data to Wide Area Workflow (WAWF). As it does this, Labeling will print an exterior container label for the pallet that includes any serial numbers or UIDs present. If a pallet ends up with more than five SNs or UIDs it offer to print a Barcoded Serial Number List. While Labeling is aggregating RFID cases and their UIDs, it records the data for easy submission to WAWF. This data can be included in a WAWF Receiving Report (DD250) or as a separate Pack Update for Receiving Report marked to supply RFID data later (referred to as Pack Later). This makes WAWF submission of palletized loads, especially those with UIDs essentially automatic.  The feature is enabled by ticking the Auto-Palletize option and entering the number of cases per pallet. This will result in display of the pallet info matrix. Labeling will calculate the number of pallets needed and the number of cases on each, along with the aggregated Weight and Cube. This may need adjustment because the rounded weight and cube for the cases is multiplied. The left column is the full pallets while the right is the partial remainder pallet with the number of cases shown in parentheses. The feature is enabled by ticking the Auto-Palletize option and entering the number of cases per pallet. This will result in display of the pallet info matrix. Labeling will calculate the number of pallets needed and the number of cases on each, along with the aggregated Weight and Cube. This may need adjustment because the rounded weight and cube for the cases is multiplied. The left column is the full pallets while the right is the partial remainder pallet with the number of cases shown in parentheses. •Weight is the total weight of the containers on the pallet, expressed in pounds, rounded up to the whole pound. •Cube is the total volume of the pallet and contents, in cubic feet, rounded up to the next whole cubic foot. The [Cube] button brings up a calculator to assist in completing the field. •Skid Wt - the weight of the empty pallet, which is added to the aggregated weights displayed before printing on the pallet label. |
•![]() RFID
RFID
RFID tag characteristics may be controlled in this section, including manual assignment of an RFID. Use of this section should be reserved for special circumstances. |
The [Print] button sends the labels to the printer associated with the label stock, the selection of which is made by clicking on [Label Stock]. The [Default] button returns the label stock to that configured for the format. The Show 2D Data option allows you to see how the data is encoded in the PDF417 symbol, if the current format includes one. Labeling will print the first label in the job along with a summary of the data encoded in its 2D PDF417 symbol. |
•[ Print SN/UID List ] - prints the Barcoded Serial Number list for these containers.
•[ Simple Label ] - a simpler editor for less complicated scenarios.
