There are three ways to get embedded items into UID Expeditor. The methods can be combined. For example, data can be imported from one or more CSV import files, then supplemented with additional items.
•Keyboard Data-Entry - uses a combination of clipboard pastes, manual keyboard-entry and database look up to create embedded item records.
•CSV Import - allows for import of embedded item data from business systems, e.g. ERP and Excel.
•Release from Shipment - brings UIDs from Shipper and Labeling into the Embedded UID Process as a framework for additional data entry. Complex embedded item data from Expeditor's UID Data Collection functionality can also be imported this way.
Keyboard Data-Entry
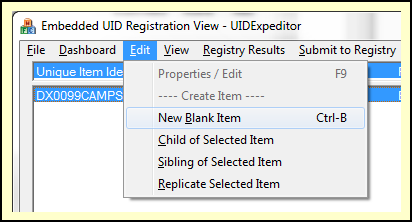
Adding embedded items to the database by hand is easy. The Edit Menu includes four commands for this, which differ only by their relationship to the selected item.
•Blank Item - creates a fresh new item.
•Child of Selected Item - is a blank item with the selected item as its Parent UID.
•Sibling of Selected Item - is a blank item with the same Parent UII as the selected item.
•Replicate Selected Item - starts with a copy of the selected item whose Serial Number (and UII) can be changed to create a unique item.
This menu of commands is also presented when right-clicking on an item.
New Embedded Item Editor
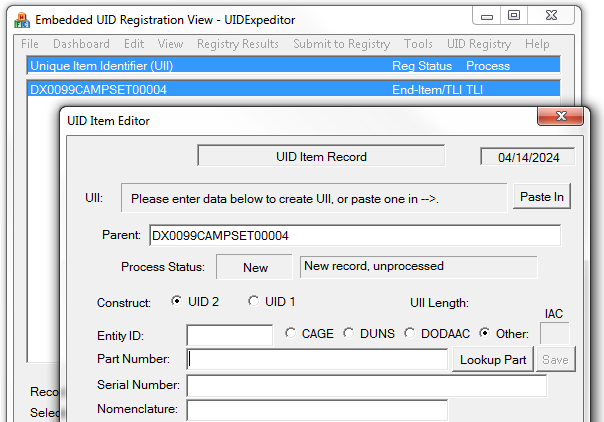
The New Item Editor is shown at right, creating a Child of Selected Item (Parent UII is populated from the selected item). It works in two different ways for Construct 2 UIIs:
•Enter the Entity (CAGE), Part Number and Serial Number and the UII will be derived.
•Paste in the UII and identify its Serial Number allowing Expeditor derive the P/N.
Once the UII is in place, key/paste in the Nomenclature, or use [Lookup Part] to retrieve it from your database.
Adding New Item by Part and Serial Number
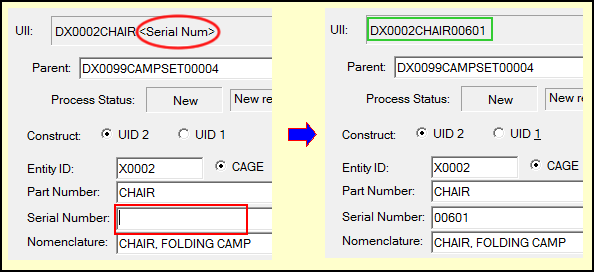
The New Item Editor opens with the cursor in the Part Number field. Complete the item by:
1.
Entering/Pasting a P/N.
2.Use [Lookup Part] to retrieve it from your Parts Database which will populate the Entity (CAGE) and Nomenclature (as shown at right, waiting for a serial number).
3.Enter the Serial Number to complete the UII.
Adding New Item by Pasting In UII
New UID records can be created by pasting in the UII, then determining the Part and Serial Numbers, and the noun. Starting with the same blank (except for Parent UII) record:
1.Copy the UII to be added to the Clipboard (we will use the one from previous example).
2.Use the [Paste In] button, and notice that the last part of the UII (P/N and S/N) has populated the Serial Number field.
3.Select the part number portion of that and press the <Del> key. As you do, the part number will move from the Serial Number field to the Part Number. (You can also select the whole P/N at once, then <Del>).
4.Once the Part Number is isolated, use [Lookup Part] to retrieve its Nomenclature from your Parts Database


