A single button click requests shipping instructions from VSM. The data in DLA's response is injected into your shipment, allowing you to print a Military Shipment Label (MSL) or the DD1387 provided by VSM. The shipping instructions help complete the shipment's DD250 Receiving Report and Invoice, which may be submitted electronically to Wide Area Workflow (WAWF).
Using VSM Integration in the MIL-Comply shipment process is fairly straightforward. However, there a variations in the way DLA handles shipments and the way the VSM Integration may be applied to your process flow. Refer to the Overview of VSM Automation to get a better understanding of the possibilities.
Starting the VSM Shipment Process
The VSM process is sequential, starting with the creation of a shipment. Refer to the Creating Shipments topic for guidance. VSM shipments are little different from other shipments. They are created the same way, except for marking them as VSM, enabling the use of the VSM Shipment Dashboard. Because VSM and labeling are so interdependent, the Shipment Dashboard integrates labeling with VSM interactions. Designating a shipment as VSM will get you into the VSM Shipment Dashboard (see Dashboard Overview).

New Shipment Details
The first steps taken on the VSM Dashboard depend on how the shipment was created. Shipments that have been copied from another, created from a template, or spawned from an EDI-850 purchase order will have many of shipment details already completed. For this purposes of this discussion we will start with a brand new shipment.
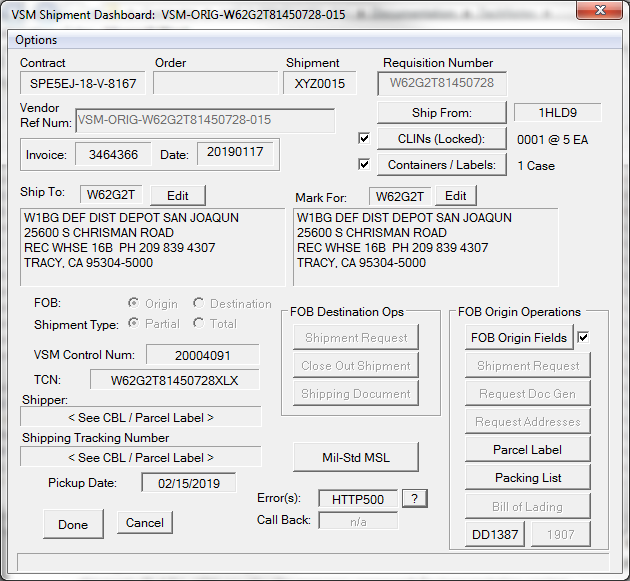
Complete the following information, which VSM needs to provide shipping instructions. Except for Requisition Number, this is the same data you would enter to generate Mil-Std-129 labels. This part is made easier with MIL-Comply's database for parts and addresses.
1.Vendor Reference Number (not shown) - is assigned by the user to identify the shipment for their own purposes It can be the same as the Requisition Number, but if there are multiple shipments against the requisition then something would need to be added to it to make the number unique, like a dash and shipment number. The field will start as the same reference number assigned when the shipment was created.
2.Requisition Number - enter as found on the purchase order (should be auto-filled by EDI 850-PO)
3.[ Ship From ] - brings up the Address Editor, then displays the CAGE code when done.
4.[ Edit Line Item ] brings up CLIN Editor then displays the number of CLINs defined. Line items must be defined before proceeding.
5.[ Containers / Labels ] brings up VSM Container Characteristics / Label Printing Wizard. Container weights and dimensions are sent to VSM when requesting shipping instructions (MSL information). The Label Printing Wizard is a convenient place to collect that information. However, you do not have to print the labels right away, just define the size, weight and contents of the containers to be shipped. Once that is done you should have enough information to request shipping instructions.

Selecting the Shipment Type
Requesting Shipping Instructions
Notice that the VSM buttons are all disabled for a new shipment. MIL-Comply needs to know the kind of shipment this is in order to proceed.
VSM needs to know the point at which the shipment is considered Free On Board (FOB), which will be on the purchase order. Also whether this shipment completes the order (Total) or not (Partial).
At this point the [ Shipment Request ] button will light up in the appropriate column. For FOB Origin shipments there is just one more thing to do, which is to indicate the type of shipment carrier is required. Clicking on [ FOB Origin Fields ] will let you do that. For FOB Destination shipments you are ready to make your shipment request.