Labeling will automatically palletize RFID cases as they are printed. But sometimes this is better done manually. Some users prefer doing this in the Container Browser because of the way it depicts what is happening. However, if you are doing large numbers of containers, the Tag Browser can be more efficient.
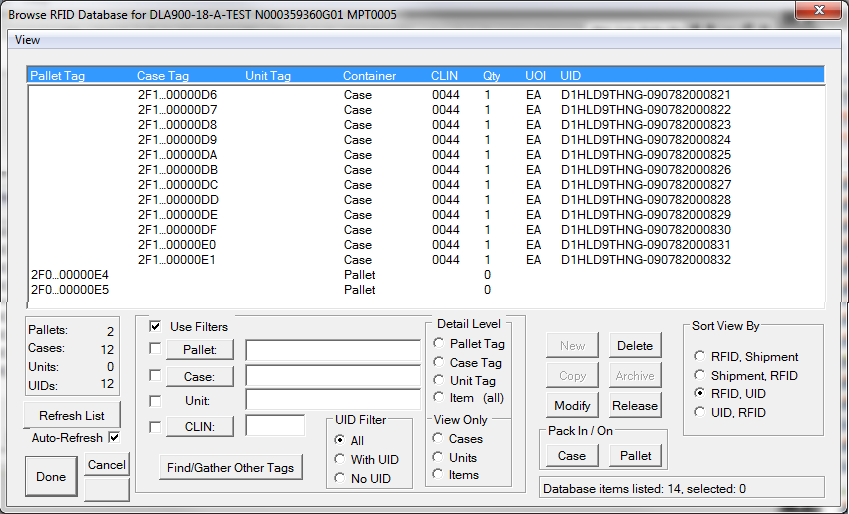
Consider this shipment, which has 12 cases and 2 pallets. You can tell the cases are loose because there is nothing in the Pallet Tag ID column for them. They would also be shown as embedded in a pallet in Container column, as we will see later.
The first step in palletizing these cases is to select the ones you want for the first pallet. Select the first case you want for the pallet by clicking on in the list. Then hold down the <Shift> and click on the last one for the pallet. ![]() If you need to, scroll down before selecting the last one, or stack them in multiple passes.
If you need to, scroll down before selecting the last one, or stack them in multiple passes.
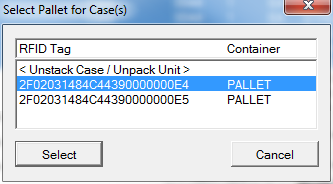
Once you have the correct case selected, do a Rt-Clk & Stack on Pallet, which will cause a list of available pallets to pop up.
Select the pallet you want. Then repeat the process for cases on the other pallet.
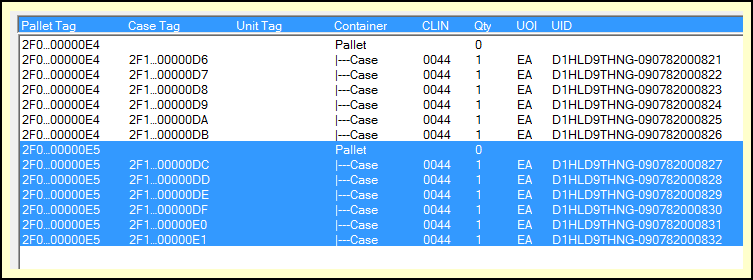
Notice that all of the cases now have a Pallet Tag ID, and they are shown as being on a pallet in the Container column.
Moving Cases Between Pallets
If you accidentally grab too many cases for a pallet, or otherwise stack cases on the wrong pallet, there are two ways to fix the problem:
•Select the ones to be moved, Rt-Clk & Stack on Pallet (or use the Pack On [ Pallet ] button). Then just pick the correct pallet.
•Or, select the mistaken ones and Rt-Clk & Unstack/UnPack, which will remove them back to the pile of loose cases.
Confirming Load Configuration
After closing the reorganized load, there a two ways to confirm that it is correct.
•Print a Pack Report, which gives a better picture of the load as well as a report you can compare the load to
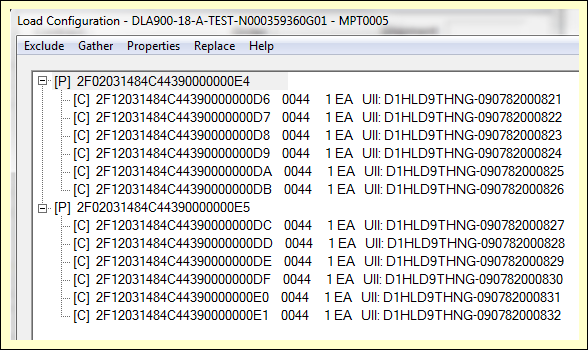
•Open up the Container Browser, which presents the load in a tree, shown below


